how-to: add a pinterest widget to your sidebar in wordpress
Let the world know how much you love Pinterest! Show ’em your latest pins to make them follow you.
In this post, I’m giving you 2 options. In Option #1, you will not use any WordPress plugins, while you’ll have to use one on option #2. I recommend going for option #1 as this will reduce the number of WordPress plugin you’re using. It’s easy, you just have to take extra step. But if you’re not comfortable, you can always use the 2nd option.
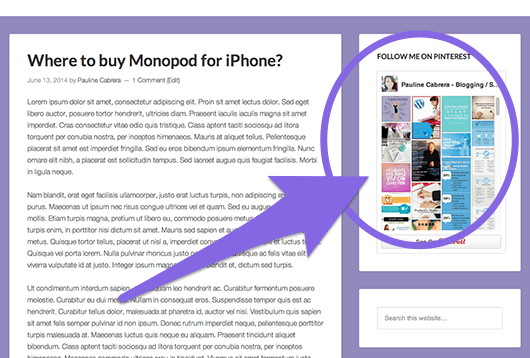
Here’s how it will look like:
Option #1: Without Using A WordPress Plugin
This time we’re using Pinterest’s official widget builder.
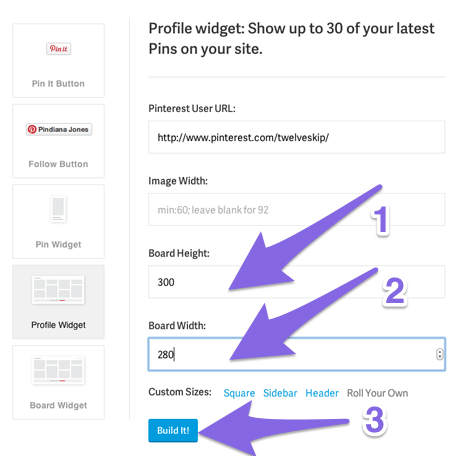
- Go to Pinterest Profile Widget Builder.
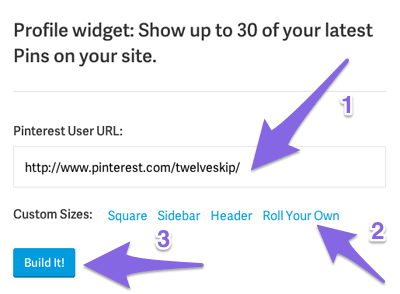
- Enter your Pinterest URL, and then click “Roll Your Own”.

- Enter your custom height and width. I entered 300px for the height and 280px for the width.

- Now click the “Build It” button.
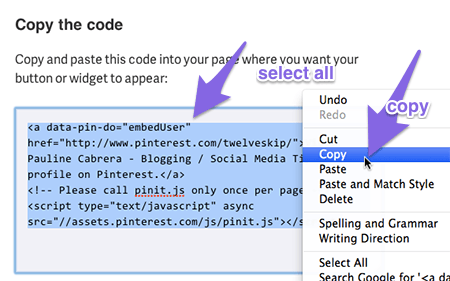
- Scroll down until you see the given code. Copy the code.

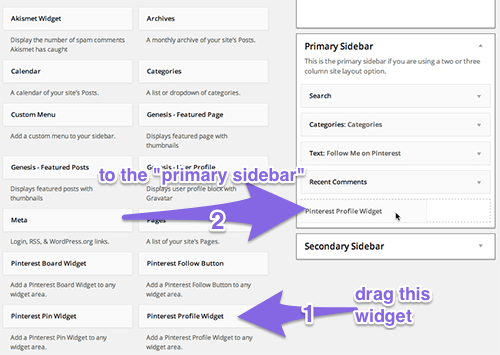
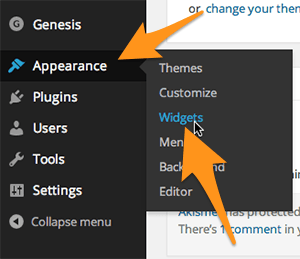
- Go back to your WordPress dashboard. Click “Appearance” > “Widgets”.

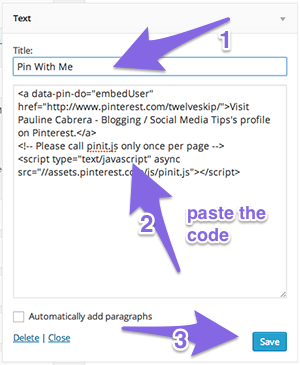
- Drag and add the “Text” widget to the primary sidebar.

- Paste in the code and click save.

- Now view your site.

Option #2: Using a WordPress Plugin
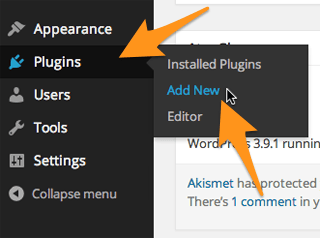
- Login to your WordPress account.
- Click the “Plugins” menu from the left sidebar of your dashboard > select “Add New”.

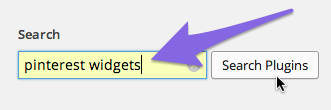
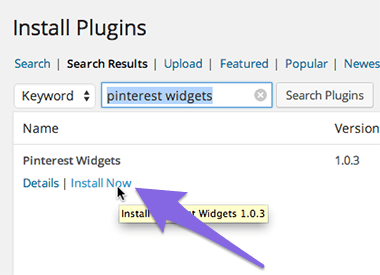
- Search up for “pinterest widgets” by Phil Derksen.

- Hit “Install Now”.

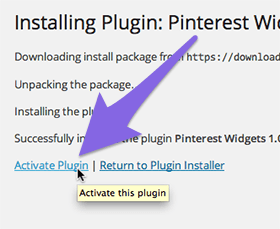
- Activate.

- Now let’s configure the widget, go to “Appearance” > “Widgets”.
- Drag the “Pinterest Board Widget” to the “Primary Sidebar” area.

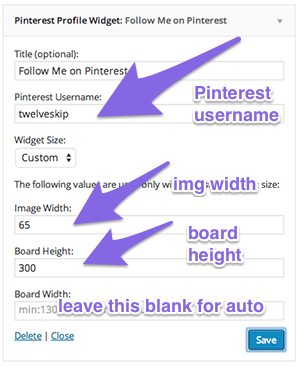
- Now modify the settings and enter your details. Enter the Pinterest Board URL. You can change the image width, board height and width, and board size if you’d like.